fbpx
STANLEY RANDOLPH: SUPERSTITION DRUM LESSON

STANLEY RANDOLPH: SUPERSTITION DRUM LESSON

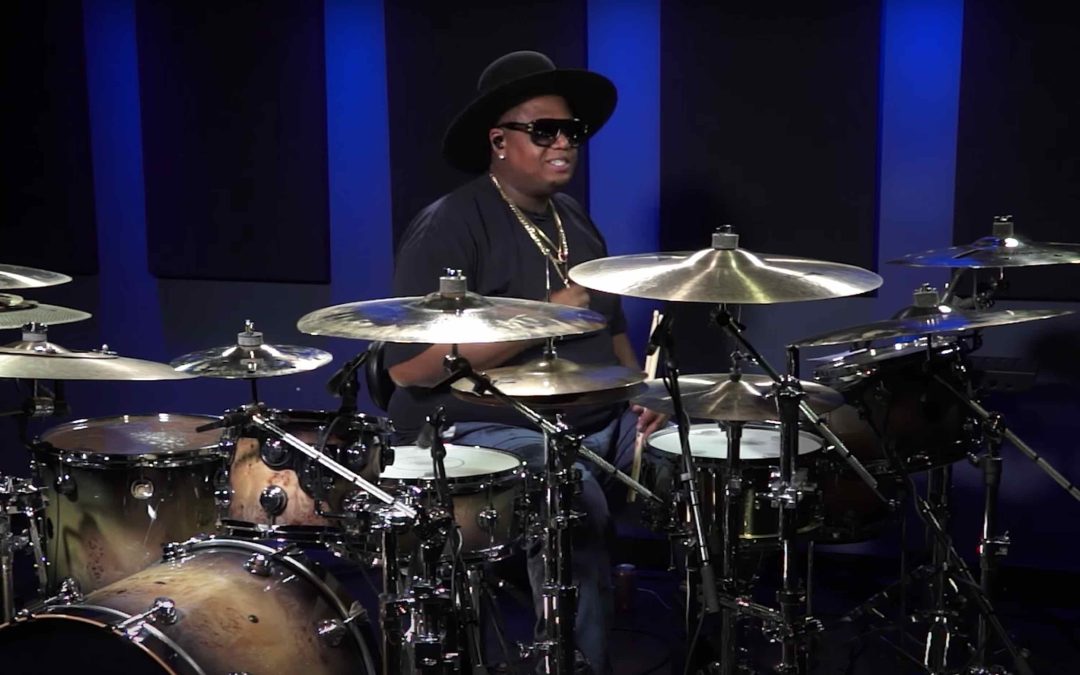
This Stanley Randolph Superstition drum lesson explores one of his live performances of the song with Stevie Wonder!

STANLEY RANDOLPH SUPERSTITION DRUM LESSON


Stanley Randolph’s regarded as one of the most talented drummers today. He’s worked with top artists in the industry including Christina Aguilera, New Kids on the Block, and Tori Braxton, and more. However, he’s best known for being Stevie Wonder’s drummer for over a decade.


When it comes to Randolph’s deep pocket and groove, he’s hard to beat! In this Stanley Randolph Superstition drum lesson, you’ll get to dive deep into his grooves! You’ll be able to download my detailed transcription of one of his live performances of the song with Stevie Wonder. Needless to say, his drumming on it is nothing short of amazing.


SUPERSTITION: A LITTLE BACKGROUND

Released in 1972 as the lead single from the album Talking Book, Superstition has become a classic! Its unmistakeable drum intro and groove and catchy melodies has captured the attention of music fans around the world. And, if you didn’t know, most of the instruments including the drums, were performed by Stevie Wonder himself… What a legend!


Live, however as you’ll get to explore, Stanley Randolph’s drumming really does take the song to a new level. He manages to keep the spirit of the original, whilst adding a fresh take that’s tight and oh-so-groovy. He’s solid, precise, powerful and tasteful yet always serving the song. He makes both easy to dance to, and a riveting listen for drummers!


At the heart of Randolph’s playing is his deep love and respect for Funk music. He has studied the great drummers including Dennis Chambers, and other legends like Vinnie Colaiuta, Dave Weckl, Steve Smith, Will Kennedy, Buddy Rich. You can read a great interview with him on Mike Dolbear’s website here

SUPERSTITION: IN DETAIL

In this Stanley Randolph Superstition drum lesson, you get to explore his playing and creative choices in full detail, as I’ve painstakingly transcribed the entire performance of the video above. The transcription reveals lots of fun and challenging phrases that will stretch your playing. There’s great use of ghost notes, syncopated rhythmic patterns, interesting use of accents during fills, and more! You can download the Stanley Randolph Superstition drum lesson transcription at the bottom of the page.


SUPERSTITION: CHORUS GROOVE BREAKDOWN

Below are two examples which are some of my favourite passages of this particular performance. Both are choruses, and whilst both might seem similar at first glance, they’re very different and offer different coordination challenges.


SUPERSTITION LIVE: CHORUS #1


SUPERSTITION LIVE: CHORUS #2


You can download the transcription for these two phrases following the link below, and continue to the bottom of the page to download the full Superstition transcription.


CHORUS ONE AND TWO TRANSCRIPTION


APPROACH TO LEARNING

When learning grooves, phrases or fills from this Stanley Randolph Superstition drum lesson, or anything else really, I would suggest to always play slowly, using a metronome to keep you steady. Another big tip which will be helpful is that, due to the fairly unusual hand and feet combinations, it might be worth learning to play the hand patterns first before adding the feet, as you would with a book like Gary Chester’s New Breed.

Learn how all of these elements come together by downloading the transcription below.


DOWNLOAD THE FULL TRANSCRIPTION HERE.


AND IF YOU’RE FEELING GORGEOUS, LEAVE ME A TIP! 😀


SUBSCRIBE TO MY MAILING LIST FOR MORE DRUM LESSONS

Get this and other free drum lessons on my blog, or sign up to my mailing list to receive them straight to your inbox (head to the bottom of the lessons page)!


Thanks again for stopping by, and enjoy!


Stay safe,


Nick 🙂

How To Use The Metronome: Reframing How You Think About It

How To Use The Metronome: Reframing How You Think About It

HOW TO USE THE METRONOME

You think you know how to use the metronome? Well, if you to be boring or even scary, you might be doing it wrong! Let’s reframe this awesome tool and make it enjoyable; as it should be! Ultimately, using a metronome to practice with is a skill that will help you loads on your journey to become a great drummer. Want more tips? Check out my drum lessons!


Let’s start with a brief historical context.


The metronome as we know it was invented in 1814 / 1816, and musicians have been using it ever since. In fact, one of the earliest recorded instances of its use was by Beethoven in 1817. Now, fast forward to 1940 when the metronome was first used in a recording; the soundtrack to Walt Disney’s Fantasia. However, thanks for the World War 2, the click track did not surface again until the 1980’s when MIDI sequencing and quantising became popular.


Fantasia is a wonderful film! Definitely check it out.


Traditionally, bands rely on us drummers to keep time and make the music feel good. That said, by the 1980’s advances in recording technology and the evolution of certain genres required drummers be able to perform to a click.


drumming independence

Recording in the studio.


And whilst it isn’t always required in the studio or live, it’s a must! You have to know how to use a metronome to develop solid time!


HOW TO USE THE METRONOME: REFRAMING


Your Personal Cowbell Pal

Agreed, harsh digital click sounds on the metronome can be quite robotic and uninspiring. However, some metronomes have the option to change the sound of the click to a cowbell! And with that, we can change our focus to make the click groove and feel good! 

Listen to legendary session bassist Carol Kaye talk about how to use the metronome in this way at the 10min mark HERE. Lastly, Frozen Ape’s Tempo and their more advanced Tempo Advance apps let you change the click sound to a cowbell. Worth checking out both here!


Clinging To The Clave

Another great way to approach practice with a metronome more musically is to use a clave to keep you in time. But hold on, what’s a clave? It’s a repeating rhythmic pattern at the centre of a song or groove. Consequently, the idea is to internalise the clave as a melody, and help it inform whatever you’re playing on top of it with its inherently rhythmic and musical theme.

Drew Milloy’s the Clave app, with its simple interface and good choice of claves is a brilliant tool in your toolbox!


The Arturo O’Farrill & The Afro Latin Jazz Orchestra


The Gap Click

Another way to reframe the way you think about how to use the metronome is by turning it into a game.

Benny Greb’s brilliantly simple Gap Click is an excellent way to develop your internal clock in a fun way. It works by letting you specify how many bars you’d like to hear with a click and how many without. Furthermore, it allows you to choose more intricate subdivisions to strengthen your time.

Here’s Benny talking about it.

It’s a great app, which I use regularly, and it won’t break the bank; it’s a great investment to help develop yourself.


More notes vs. less notes

Similar to working with a gap click, another interesting take on using a metronome is what subdivision you set it to play. Think that the smaller the subdivision (i.e. semi-quavers / sixteenth notes), the more reference points, the more you work on your stroke accuracy. Conversely, the less notes you use, the game becomes more about your steadiness.


HOW TO USE THE METRONOME: ALTERNATIVES

Whilst not strictly a the same, the following ideas are great alternatives to a click if you’re still unsure about how to use the metronome!


Playing to music

Using the music that you enjoy or want to play means you’re playing along to that particular drummer’s feel. This is a fantastic way to develop your time feel. You’ll understand, particularly if you’re learning songs from different genres and bands, all with their own time feels… The more you hone in on every stroke, the clearer the differences in feel will become.

A great app called Moises lets you upload tracks to it, then cleverly separates the song into individual instruments (e.g. drums, guitars, bass, vocals, keys, other). You can then mute, or lower the volume of, your preferred components to either isolate your instrument to listen to it more clearly, or turn down your instrument for you to play along to the track unencumbered.


Backing tracks

In my experience, backing tracks tend to be recorded very metronomically (unless you’re playing to a band’s song where the drums have been removed). This is great as, in a way, you’re listening to a “musical metronome”, forcing you to play solidly. This channel is one I use regularly, as it’s got tons of great tracks.


Use / create your own loops

Loops are a great way to practice musically and metronomically. iPad / iPhone apps like GarageBand enable you to very easily and quickly create a quick loop based on a rhythm / melody for you to jam an idea to.

Here’s one I made a few months ago, and here’s the quick lesson to along with it.


E-Kit Metronome Functionalities

Brands like Roland and Yamaha’s electric drums offer fantastic functionalities for you to develop your time. Yamaha, who’s been ahead of the curve for years in this respect, offers the following training settings:

  • Measure Break: the metronome inserts breaks into the click track each time it loops around; your job is to continue to play through the silence until you hear the click again.
  • Groove Check: This training exercise measures how far behind or ahead of the beat your hits are. As you play to the click, Groove Check shows your hits in relation to a perfectly in-time quarter note. If your timing is rushing and you’re ahead of the beat, the hit marks will move to the left. If your timing is dragging and you’re behind the beat, the hit marks will move to the right.


The Yamaha DTX10 eDrums are Yamaha’s flagship electronic drum kit


  • Tempo Up/Down: Use the Tempo Up/Down exercise to see how fast you can play and still maintain accurate timing. As you play along, the metronome will automatically increase the tempo if your timing is good, but will decrease the tempo if you need more practice playing in time.
  • Change Up: In Change Up, your goal is to maintain accurate timing as you play along with up to seven different practice rhythms (subdivisions) that change every two measures. You can increase or decrease the tempo as you go along.

Read more about that here.


Thank you for reading! I hope you’ve found this article helpful. Please consider subscribing to my newsletter, as well as follow me on social media:

Instagram

Facebook

YouTube

Nick 🙂

DRUM LESSON: DRUMMING INDEPENDENCE

DRUM LESSON: DRUMMING INDEPENDENCE

As drummers one of the skills we look to develop is drumming independence. By this of course we mean, broadly-speaking, the ability to play multiple rhythms at once, or also being able to play notes between beats to spice up grooves and fills.

To me, this is one of the important tools in our toolbox because having good drumming independence lets us focus on playing rather than worrying about how to play it. In other words, we can be present in the moment and make music, and as a drum teacher this is important for me work on with students.

In this drum lesson, I’d like to give you some useful tips I share with my students regularly. These will be primarily around independence between the hands and feet. In addition to this, you’ll find a free PDF with some exercises for you to have a go at below.


“SPLIT” YOUR BODY

Try to think of your body in two halves: waist up (i.e. arms / hands) and waist down (i.e. feet).

One way to think about it could be your hands acting as the “lead” whilst the feet be the “rhythm section”.

Hey, thanks for reading so far… If you’re in the London and want face-to-face or online drum lessons in London, get in touch.


IDENTIFYING OSTINATOS

A rhythmic ostinato is defined as a repeating rhythmic pattern. So, we once you get your head around the idea of “splitting” your body, try to identify any ostinatos to latch on to. This is helpful as once you’re able to play these patterns in “autopilot”, playing rhythms / stickings / patterns on top of the ostinato becomes a lot easier!


MELODIC THINKING

Following on from developing ostinatos for independence, thinking melodically about patterns (be it with the feet, hands or both) can make our life a lot easier. This is because we’re thinking about music rather than combinations of Rs and Ls.

How can we tease melodies out of patterns? It’s not hard to do so. Simply “mute” one of the, for instance, hands playing a pattern, and note the “melody” that the unmuted had creates. Let’s take the Single Paradiddle for example; see the examples below

drum lessons drumming independence

Single Paradiddle R melody (muting L)

.

drum lessons drumming independence

Single Paradiddle L melody (muting R)


Here’s groove example based on ostinatos I’ve developed…


… And the music I wrote inspired by the groove:


Ultimately, the less you think in terms of Rs and Ls and more about “melodies”, the more musical you’ll be. Consequently, the benefits when it comes to learning other licks will have a huge pay off. Come for drum classes for more tips!


PDF EXERCISES

In the free downloadable PDF, you’ll find different 16th note ostinatos for you to try different sticking combinations. My suggestion, when it comes to orchestrating the hand stickings, would be to start easy first. Play the stickings on the snare to begin with, then try exploring moving your R hand around the drums. Once comfortable with that, then move the L hand around, etc.

Spend time on each ostinato with each sticking (don’t just play each sticking once). Also, use a metronome to help you keep time, and if you want to challenge yourself further to strengthen your internal clock, use a Gap Click.


DOWNLOAD PDF HERE


book

If you liked this drum lesson, check out my book “Concepts”. It contains lots of excellent ideas to help you improve your drumming!


CONCLUSION

As I mentioned, drumming independence is a great skill to develop as it lets us focus on just making music. Moreover, it can also be a great way to discover cool grooves and fills that can become the basis for cool new song ideas with your band, or for your own compositions.

Have a go at exercises, go slow to begin with and be patient. Enjoy!

TIPS TO PRACTICE YOUR PARADIDDLE CHOPS

TIPS TO PRACTICE YOUR PARADIDDLE CHOPS

In this post we take a look at some tips to help you develop your Paradiddle chops using the “outward” Paradiddle inversion (RRLR LLRL).


PARADIDDLE MELODIES

Every sticking has melodies hidden inside them. These are useful because they help us think of “dry sticking patterns” as actual musical phrases.

Paradiddles are no different. We can isolate these melodies by increasing or decreasing the volume / dynamic level of each hand as we play the sticking pattern. In this example, taking the RRLR LLRL Paradiddle inversion’s R melody, we would accent all the right hand notes and play the left hand notes as ghost notes.


nick schlesinger paradiddle drum lesson RRLR LLRL

“Outward” Paradiddle inversion’s right hand melody highlighted by accents


INTERNALISING AND SINGING

Here the idea is that as you practice a sticking, work to internalise the melody until it’s second nature. As such, we want to be able to feel it, making it part of our vocabulary. 

Next step is to try and sing the melody as we play. Even if we’re not playing a groove / fill with that melody, aim to sing it as it will change how your groove feels, and will inform your groove and fills.

With this in mind, once comfortable with the melody, try and orchestrate grooves and fills with it. Consequently, for linear grooves and fills, try replacing R notes with bass drums, for example. Experiment with multiple combinations between R and bass drum.


PARADIDDLE MELODY PRACTICE LOOP

Note that the rhythm of the track mirrors the R melody. So, as you play along to the track, don’t stop singing it! This will help solidify your phrasing and make your playing feel more musical.


Lastly, if you’re interested, here’s a little 1 minute song I wrote where I based the intro groove idea on this RRLR LLRL Paradiddle inversion. Indeed, watch it below, or follow this link to watch it on YouTube! Don’t forget to subscribe.


PDF EXAMPLES

Download the free PDF below which has some groove examples as well as some linear fill ideas which are based on this Paradiddle’s right hand melody.


DOWNLOAD FREE PDF HERE


LEARN MORE

If you want to learn more about the Heel Toe or some one-to-one lessons to help you troubleshoot or nail it, check out my drum lessons and get in touch! You can also check out my drum tuition book Concepts to help you create your own awesome grooves and fills!


drum book

Check out my book Concepts to help you come up with cool new grooves and fills with really simple ideas!


Thanks and enjoy! 🙂

Nick

Should I play drums barefoot or with shoes?

Should I play drums barefoot or with shoes?

In this blog post we explore whether to play drums barefoot vs play wearing shoes; the debate rages on!


POP QUIZ!

Why don’t we start off by getting you to answer the questions below?


Question: Would you wear

Answer

Jeans to the bath or shower?


Thick winter gloves to eat dinner at a fancy restaurant?


A traditional Mexican sombrero to run a marathon (London Marathon aside, of course)?


Sleep in a sleeping bag under your duvet under regular circumstances?


You’ve probably guessed which way I prefer to play, but read ahead as I think there are good considerations to explore.


WHY WRITE ABOUT THIS?

By some sheer coincidence, I’ve recently been teaching a lot of my students the Heel Toe technique to play fast doubles on the bass drum. Indeed, as I demonstrate it to them, they usually notice that I play barefoot (or with socks). To which, surely, enough I get the “why do you play drums barefoot?” question.


Below I wanted to summarise my views on this subject as I think there’s value in discussion. Consequently, remember that there’s no right or wrong, only what works for, and feels good to, you! Of course, it’s worth giving both ways a genuine good go, as it will help you make an informed choice. Similarly, learning to be comfortable playing both ways (barefoot and with shoes) can only make you a better player.


MY JOURNEY TO PLAYING DRUMS BAREFOOT

I’ve gone through the whole journey to arrive at my conclusion that playing drums barefoot was the way for me. Previously, I used to swear by playing drums with shoes on. Paradoxically, I was always looking for the lightest and least intrusive shoes I could find. 


Classic slip-on Vans, Converse Chuck Taylors, Vivobarefoot shoes, etc, I tried them all! Subsequently, they were all great options until they weren’t any longer! At which point it was time to ditch the shoes altogether.


Vivobarefoot are a great company who make great shoes!


This new unencumbered feel of the pedal was, for me, a breath of fresh air. In contrast, the difference was night and day… Like I had been knitting wearing ski gloves! Getting fully acquainted with the new feel wasn’t immediate, it took a little bit for it to feel second nature.


OBJECTIVELY-SPEAKING

Here’s a summary of the some of the benefits of each I can think of, as objectively as I can.


BAREFOOT / SOCKS

SHOES

True and accurate feel and feedback from the pedal

Added weight and mass to the foot can help with speed and control

Natural foot movement on the pedal(s) unrestricted by the shoe’s mass and sole

Sole of the shoe provides grip on the pedalboard

If you’re not wearing your “drum shoes” and have to play, just take your shoes off and go

Practical when playing outdoors and its cold to keep your feet warm

You don’t have to spend extra money getting “shoes for drumming”


Can expose stinky feet, or embarrassing socks (but come on, there’s no such thing as embarrassing socks, or is there?)


DIGGING IN

Having a think about what we’ve covered so far, the drive to find the most comfortable drumming shoes is a journey that most drummers go on. Accordingly, the idea of accurate feedback from the pedal and unrestricted movement were key in switching to play drums barefoot… Indeed, you can’t get any lighter than no shoe at all, right? As silly as the questions at the beginning of this post were, they reflect my need to go as natural as possible.


However, there are other drummers who go another way. Jojo Mayer, who plays with shoes on, modifies his shoes to have a leather sole in order for his foot to move freely on the pedal. Similarly, if you ever noticed the design of his signature pedal, it is completely smooth in order to facilitate alleviate unwanted grip.


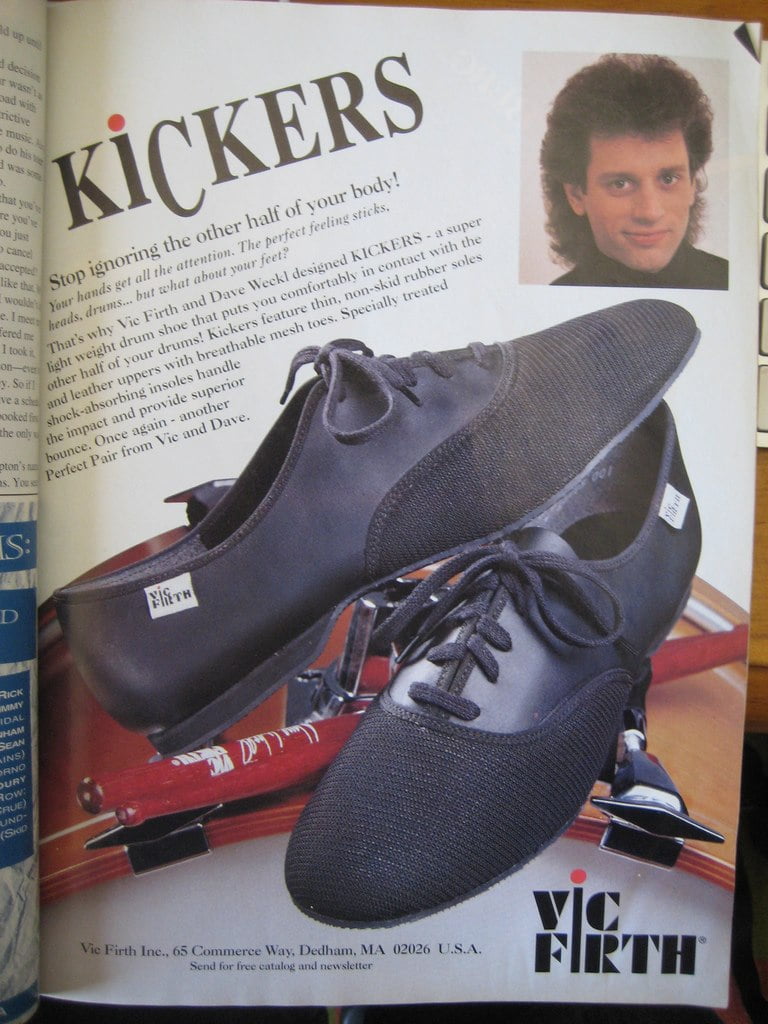
Furthermore, in the mid-nineties, Vic Firth and Dave Weckl collaborated in developing the completely crazy Vic Firth Kickers Drum Shoes. Let me invite you to bask in this 1995 advert’s intense cringe glory. Personal tastes aside, the idea of this shoe was a good one, yet whilst it was aiming for something lightweight, it was still donning a sticky sole. Not sure when these might have been discontinued.


vic firth dave weckl kickers nick schlesinger drums blog

Stylish you say? Get a load of these beauties.


My point here is that we’re searching for the most comfortable solution, which seems to be the least intrusive and lightest one. Be it retrofitting your favourite shoes with a leather sole, or going to great lengths to develop, mass produce and market a light, breathable drumming shoe. Why not just go barefoot (or wear a a pair of socks)?!


CONCLUSION

To sum up, there are no rights or wrongs in how you choose to play; you have to try both ways and make your own mind up. Personally, I think it’s worth a try if you’ve been curious to do so. However, whatever you do, avoid those Vic Firth Kickers Drum Shoes.


LEARN MORE

If you want to learn more about the Heel Toe or some one-to-one lessons to help you troubleshoot or nail it, check out my drum lessons and get in touch! You can also check out my drum tuition book Concepts to help you create your own awesome grooves and fills!


drum book

Check out my book Concepts to help you come up with cool new grooves and fills with really simple ideas!


Thanks and enjoy! 🙂

Nick

The Only Way Out Is Through: Groove Breakdown

The Only Way Out Is Through: Groove Breakdown

I recently posted a fun 1 minute track called The Only Way Out Is Through. It caught some drummers’ attention, so I thought I’d offer a quick breakdown of the grooves that shape the entire piece.

MELODY: INVERTED PARADIDDLE (RRLR LLRL)

The basic melody of the groove is based on the RRLR LLRL Paradiddle inversion, which is sometimes referred to as the Outward Paradiddle. This is because the Diddle is at the beginning of the sticking. Notice I’m playing the R melody on the hi tom.

the only way out is through

As the track progresses, two things happen. The first, I add eighth notes on the stepped the hi hats underneath  in order to increase tension.

the only way out is through

Then, to further add drama, I start alternating the R melody between two sound sources. These are the hi tom, and a little splash stack I made (you can use whatever you have at your disposal if you don’t have a stack). This orchestration has the ostinato, explained in the following section, played underneath it.

The only way out is through

THE OSTINATO

The ostinato I’ve used is fairly simple to learn on its own. The feet play a RLL pattern, where I alternate the L between the “slave” pedal of my double bass pedal and the hi hat. In order to more easily play this, I use the heel toe technique in order to make the motion be based on a single “up / down” movement with this foot. This also means that the L foot, as it plays the hi hat pedal, I get a little splash / chick sound from the hats.

the only way out is through

THE ONLY WAY OUT IS THROUGH: THE TRICKY BIT 

Where things get complicated is putting the the hands and feet together. The ostinato is a 3 sixteenth note pattern, which I play under the hands, which play a straight-forward sixteenth note subdivision. As a result, this means that the ostinato works against the hands, and fully resolves every 3 bars.

DOWNLOAD THE FULL GROOVE PDF TRANSCRIPTION HERE

The biggest tip I can give you in order to nail this is to practice the ostinato first, feeling it as sixteenth notes. Get it down so you can play it in autopilot. Practice easier stickings on top of it as you build your coordination. Be patient, and ensure to use the heel toe technique (or similar) in order to minimise the effort to play this pattern. Once you’re comfortable, then start adding the Paradiddle and the orchestration that follows.

A lot of the ideas for this stuff come from my book Concepts, so please go check it out and get yourself a copy! You’ll get hours of fun applying the ideas inside to your playing.

Check out my book Concepts for tons of creative ideas to apply to your drum kit.


Lastly, do check out my 1 minute track playlist on my YouTube channel. It’s got lots of fun, short tracks varying  in styles / genres! And gimme a follow on Instagram, if you fancy regular updates!

I hope you’ve enjoyed this brief breakdown lesson.

Nick